Building 3DS Helm Chart is mostly similar to the method used for the general one. Therefore, the main programs for running a Helm Chart must be installed in advance. Please refer to the pre-installation guide if necessary. Also please note the updated Helm Chart configuration guide for v16.1.0 or newer.
Additionally, the 3DS specific version contains the following customizations:
Includes an ODT filter to process ODT (ODF v1.3) files
Contains 3DS specific fonts
1) TFO Installation
The installation isK8s TFO installationespecially the section for AWS authentication. We will proceed up to that part.
1) Version 16.1.0 or later
Once AWS authentication is complete, proceed with the installation using the command below.
helm upgrade --install thinkfree oci://${ACCOUNT}.dkr.ecr.${REGION}.amazonaws.com/thinkfree-office-chart \
  --set image.pullSecrets[0]=${SECRET_NAME}
  --version 16.1.0-3ds
thinkfree: This corresponds to the Release Name in the HelmChart, and you may change it to a different name.
--version : Enter the version you want to install.
Note: In the case of Dassault, the version value has changed to the “16.1.0-3ds” format starting from version 16.1.0. To install an earlier version, you must use a version value such as “16.0.0.3ds”.
2) Versions prior to 16.1.0
Once AWS authentication is complete, create the values.yaml file as follows and proceed with the installation.
cat > values.yaml <<EOF
image:
  tag: "16.0.0.3ds"
EOF
- tag : Enter the version you want to install. If you use the value as is, version 16.0.0.3ds will be installed.
helm upgrade --install thinkfree oci://${ACCOUNT}.dkr.ecr.${REGION}.amazonaws.com/thinkfree-office-chart \
  --set image.pullSecrets[0]=${SECRET_NAME} \
  -f values.yaml
thinkfree: This corresponds to the Release Name in the HelmChart, and you may change it to a different name.
2) Activate ODF filter
Currently, ODF is not officially included in the official Thinkfree Office product suite. Therefore, you must enable the filter to test properly.
You can enable the ODF filter through the following process .
Access the Thinkfree Office administrator page and log in.
(The values below are set by default after installation and can be changed after logging in.)id : cloud
password: weboffice
‘Setting’ → ‘Additional setting’
Click 'Add a row' and enter a value into the newly created row.
Enter 'useODFExternalFilter' in the 'key' column.
Click the magnifying glass button.
Select 'False' for the 'value' column.
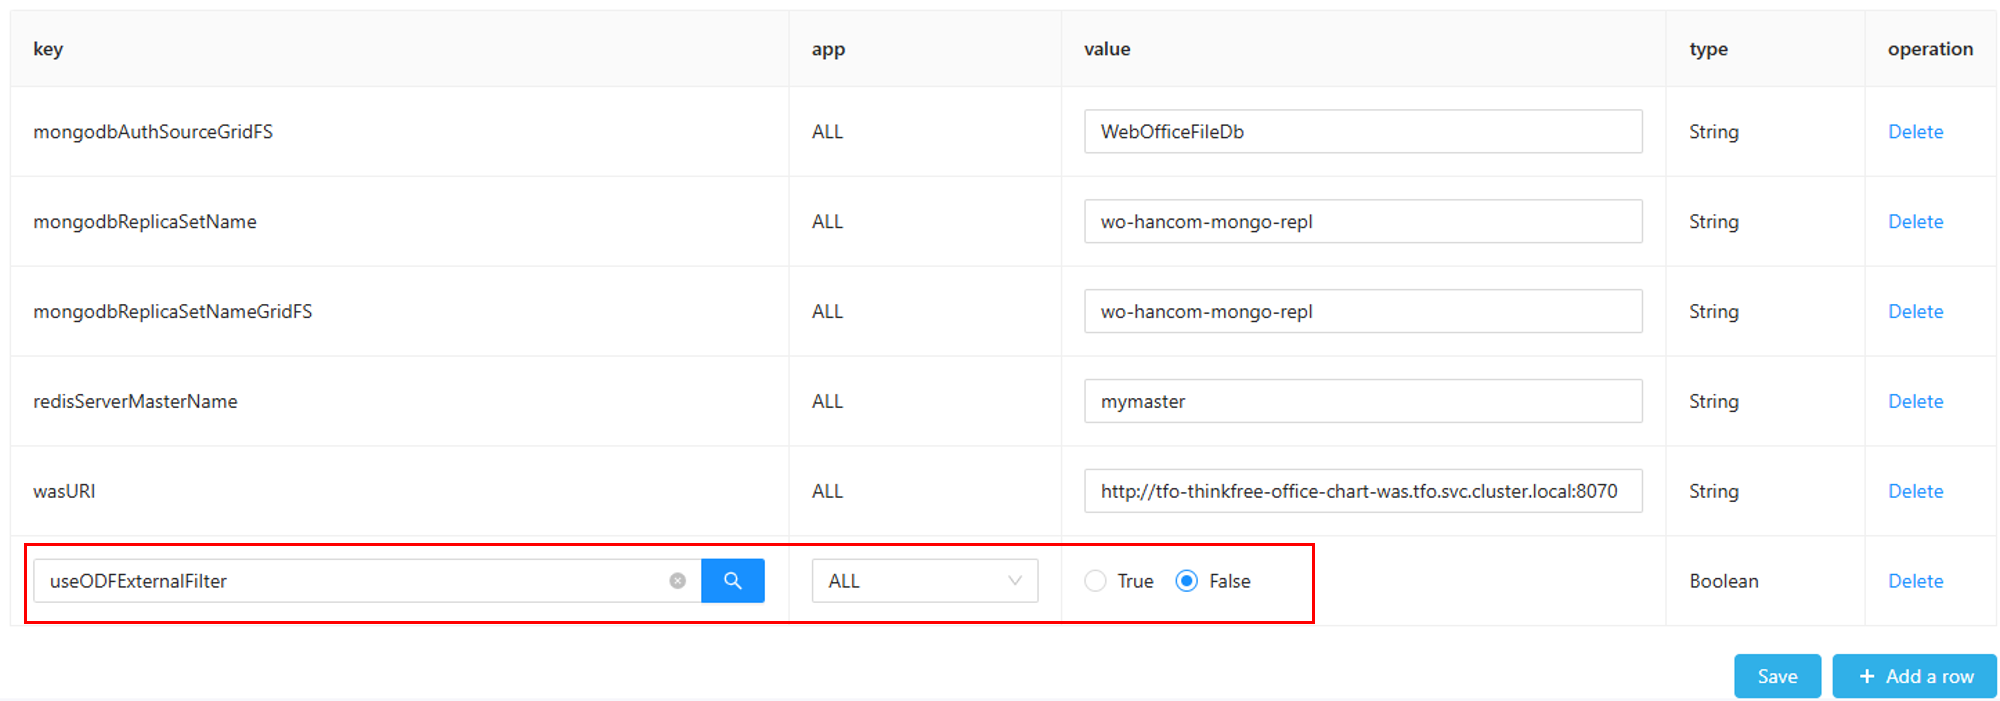
Click the 'Save' button.
Testing the installation
Tests tooK8s TFO installationProceed exactly as described in the document's test method.
Once the Web Office license registration is complete, you can test ODT documents via the URL below.
Was this article helpful?
That’s Great!
Thank you for your feedback
Sorry! We couldn't be helpful
Thank you for your feedback
Feedback sent
We appreciate your effort and will try to fix the article